Size Matters: What Size Chainsaw Do I Need?

If you’re considering purchasing a chainsaw, you’re probably thinking about the size chainsaw you’ll need. With tons of sizes of on the market, deciding which chainsaw to purchase might be difficult. 

Should you invest in the biggest chainsaw that you can buy, or are shorter chainsaws a better bargain? 

I’ll help you pick the ideal chainsaw size for your specific needs and that suits for your budget.

By the conclusion, you’ll be able to choose a right-sized chainsaw to purchase for each job based on your needs.

Choosing the Correct Size Chainsaw

The length of a guide bar is most responsible for determining the size of a chainsaw. The guide bar is the metal bar on which the chainsaw’s chain revolves. The entire length of the guide bar may be shown on the bottom of the side the blade, in the product handbook, or advertised online.

But, if you have one already but are not sure about its length, here’s how you can measure your chainsaw:

  • Take the tape measure out of your pocket and measure at the starting point of the chain from the outer-end of the bar to where the guide bar connects with the engine housing.
  • If the length is odd, round up to an even number, such as 12″ or 10″.

The Right Size of a Chainsaw

As a rule of thumb, the chainsaw must be a minimum 2-3 inches longer compared to the width of the branch that is cut.

To give you a quick example, if you are cutting a branch that is 10 inches in thickness, the best chainsaw guide bar (or blade) must a bare minimum 12 inches long. It permits the wood to be sliced through in a single continuous motion.

Another element to consider when sizing the chainsaw is the engine’s power. 

Typically, the engine’s power is proportionate to the guide bar’s length. A longer guide bar is better supported by the engine

You may change the blade on most chainsaws for a longer or smaller one. For example, you don’t want to go any farther than the first step in the guide bar that comes with the equipment.

The engine, at times cannot handle a guide bar that is more than two inches beyond the manufacturer’s blade.

Which Chainsaw Sizes Are Best For Each Job?

Every woodcutting operation necessitates a certain length of the chainsaw blade for the safest results. The chart below summarizes the recommended chain saw sizes for all kinds of tasks

  • For pruning limbs, the size should be no shorter than 6” and no longer than 10”.

A 6″ to 10″ chainsaw is the best option for most needs, such as trimming small branches thin trunks. A small handsaw, on the other hand, maybe more appropriate for work with branches that are a few inches thick or sometimes even less than that.

  • For removing the branches, the size should be between 8” to 12” 

While removing larger tree branches at home, the branches can be around six to ten inches thick. To make the process quick and simple, the guide bar must be at least 8′ to 12′ long.

  • Felling small branches and trees- 12″ to 14″

The thickness of the tree trunk will determine a lot! At times it may be necessary to cut down small trees with a chainsaw that measures roughly 12” to 14”.

  • Firewood splitting should be done with the size between 14″ to 16”

If you’re splitting small pieces of trunk into firewood, a 14- to 16-inch chainsaw will generally suffice unless the logs you’re cutting are exceptionally huge. 

  • Medium trees should be felled with 16” to 18” sized saw

A larger chainsaw of size 16″ to 18” is required to fell a medium-size tree with a trunk diameter of approximately 14′’ to 16′.

  • Large trees should be felled with 20″ and above

Larger trees should generally be cut down by experts. However, if you have previous chainsaw expertise and can safely control a bigger chainsaw, you’ll want one with a guide bar that a minimum 20” long. 

What if the size of your chainsaw is a bit long

The ideal option may be to buy a big chainsaw that will be ready for any sawing demand that comes up.

It’s also possible that using a chainsaw that is too long for the job might be hazardous.

If a timber cutting saw is just a couple of inches too long, it’s usually not an issue; however, larger saws create more vibration and weight, which can be difficult to control.

You must choose a chainsaw with manageable size so that you can cut or prune only that needs to be removed and nothing else for simpler, more detailed work.

Additionally, longer chainsaws are more prone to kickback. Kickback occurs when the chain rotation is blocked, causing the chainsaw to “kickback” towards the chainsaw operator.

For these reasons, stay away from buying or using a chainsaw that is too long for the job. By getting the appropriate size from the start, you’ll save money.

What if the size of your Chainsaw is not Large Enough?

However, you could observe that your chainsaw is shorter than the wood you need to cut by two inches. However, it is still feasible to use a chainsaw that is smaller than the wood’s diameter. In this case, it’ll just take a few slices to completely cut through rather than only one pass with the longer chainsaw.

If you use a chainsaw with a too-small diameter, you’ll be cutting from opposite directions on one side of the tree rather than working your way methodically from one end to the other. If the wood’s diameter is larger than twice the length of your chainsaw, it isn’t capable of doing the task.

It’s time to think about purchasing a larger chainsaw if the chainsaw is too little for the work. If you’re looking for a way to make your backyard look more industrial, this deck railing kit from DIY Backyard Ideas is perfect.

What is the perfect size for a Chainsaw?

You learned that the answer to the question, “What size chainsaw do I need?” is significantly different depending on the application. If you’re cutting small branches, a smaller chainsaw is required, and if you’re cutting down big trees, a larger one is necessary.
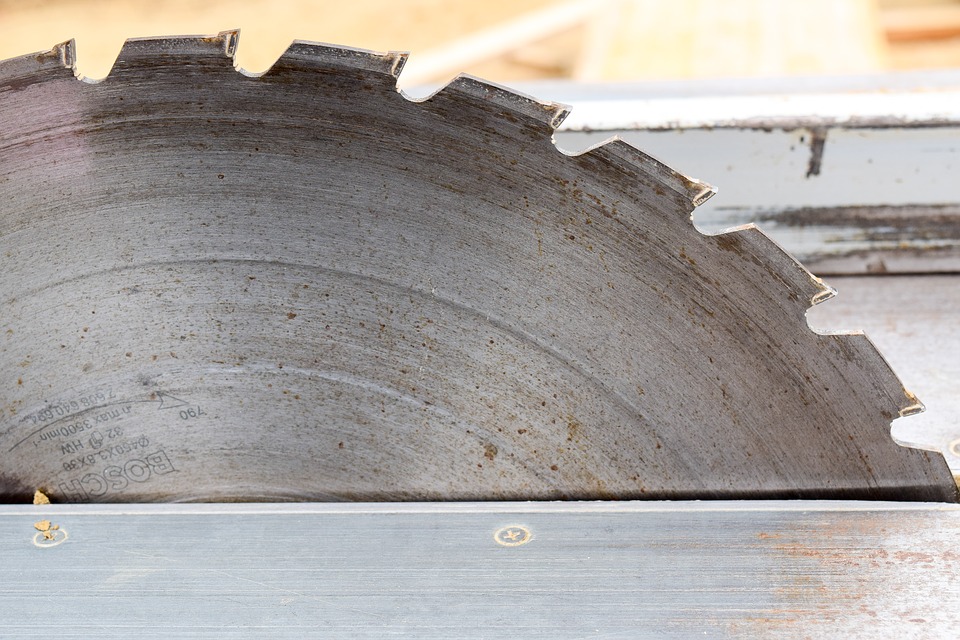
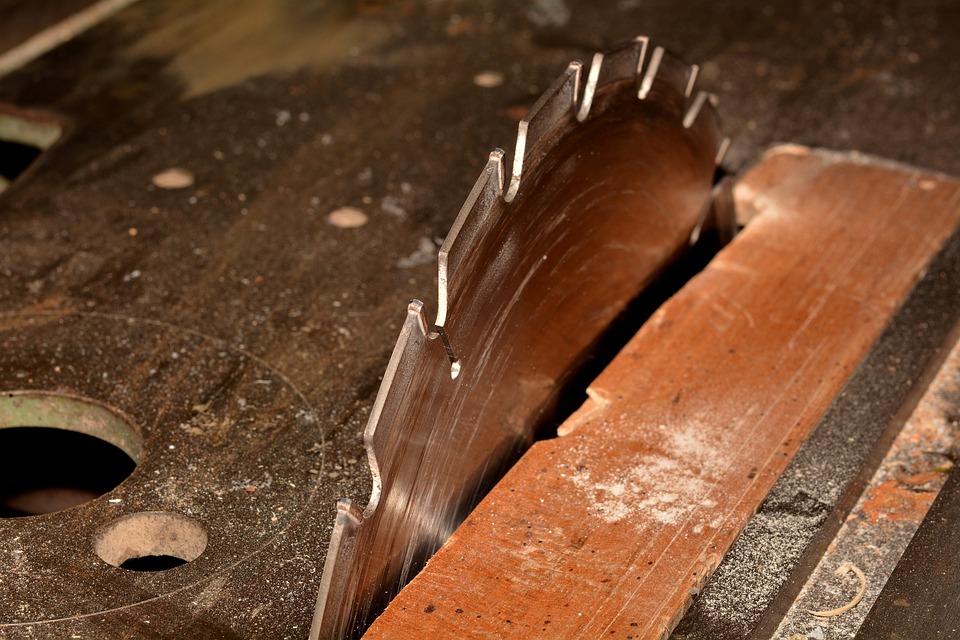
Table Saw Splitter vs. Riving Knife: What’s The Difference?

A riving knife is included with every new table saw you may purchase. This metal component attached to the saw’s arbor prevents wood from contacting the blade’s teeth. The fresh blades may not be as intriguing to those who still utilize an old-fashioned splitter. After all, both methods are designed to keep kickback to a bare minimum. Despite this, there are several key distinctions between the two sorts of safety equipment. 

Detailed comparison of Splitter and Riving Knife

The riving knife of a table saw is an important safety feature. A riving knife is a thin, flat piece of metal that sits behind the saw blade and serves as a riving guide. When you pass a workpiece through the saw blade, the riving knife prevents the two cut sides from closing on the saw blade, producing a potentially dangerous backlash. When doing rip cuts, it’s critical to use the riving knife since they are more likely to kick back.

However, even when using a riving knife to minimize the danger of kickback, it may not be eliminated. When utilizing a table saw, it’s critical to follow the manufacturer’s recommended safety measures at all times. Make every effort to be safe when operating power tools. When using a chainsaw, ensure that you are dressed appropriately, wear certified safety glasses and ear protection as needed, keep your hands away from the blade, and stand so you’re less likely to be injured if the board shifts suddenly.

A splitter, on the other hand, seldom varies in height; while the blade of a riving knife does. Because the top of a real-riving knife rests on the blade, non-through cuts such as grooves, rabbets, and dado don’t need to be removed. Every table saw comes with a splitter (which supports the blade guard) as standard equipment.

The splitter knife must be simple to install and remove, which makes things even more difficult.

What is the best way to keep a splitter in place while making a dado cut? According to studies, most splitters are lost during dado cuts. The splitter was rarely if ever switched out, and when it was, it was only to conserve space. According to more recent research, most injuries caused by table saws were due to kickbacks. It’s impossible to emphasize enough how vital it is to follow good safety procedures.

Backgammons are frequently the consequence of a wobbly fence; if one side of your blade is on fire, your fence may be out of alignment. Kickbacks may occur when ripping a board because of the stresses in the end grain, pushing against the back of the blade.

Splitters, on the other hand, maybe up to 2 inches away from their blades since they are installed. Riving knives are always 1/4 to 3/8 inch away from their blades, but splitters may be up to 2 inches distant. The thin stock is used to keep the wood open, which helps avoid kickbacks—the wider the gap and the higher the risk of a kickback, the thinner the wood.

For this reason, many contemporary designs allow you to rapidly raise or lower the blade guard while still utilizing the riving knife.

When the blade is lowered, the gap between the edge and splitter widens because it does not rise and descend with the blade. So, if anything catches on the rear of the blade, or an offcut skews around it and makes contact, there’s a higher risk of kickback.

You may construct your riving knife on a table saw, but there are also ready-made aftermarket riving knives.

Instead of a standard splitter, you might create several interchangeable throat panels with their own customized typical or curved splitters set to a specific blade height. This is superior to using a basic splitter, but it’s still not as good as employing a genuine riving knife.

Which one is better?

Knives with Riveting Edges Are More Versatile Than Those Without

Because it is linked to the saw’s frame, the riving knife goes with the blade when lifted, lowered, and tilted. Keep a riving knife at least one inch away from the rear of the blade when using it to avoid damaging your saw.

Riving knives are available in both high- and low-profile versions. Use high-profile riving knives, which are usually part of a larger blade-guard system, when making through cuts. The handle of a low-profile riving knife is shorter than the blade. Riving knives are used to cut dadoes and rabbets. Depending on the type, riving knives may be utilized for straight as well as curving cuts.

A riving knife is less likely to need to be removed when using a circular saw, making it safer for all of your cuts, not just a few of them. It’s flat, metallic, and readily cuts with a saw blade. When you feed the wood through the saw blade, the riving knife prevents the split portions from closing.

Kickback is a common problem with table saws, especially those that are used heavily for woodworking. This is the type of encounter that will make your heart race. The worst-case scenario is that your palm will be drawn into the blade, and your fingertips will fly across the room. If the danger is greater, it may discharge a piece of wood at your chest or nose.

A riving knife may help you avoid such a catastrophe. When using a riving knife on your saw table, keep the following points in mind: Make sure the material is as thin as your blade. When the blade wraps around it at close quarters, it must rise and fall in time. To make matters worse, the knife’s top must now protrude below the handle.

Although a riving knife can help with these issues, it is not ideal and cannot prevent all of them. A knife like this does not eliminate all danger. There’s still the potential for a kickback to occur. However, if you must, use safety equipment such as gloves, goggles, and earmuffs. Avoid the saw blade at all costs. Decide on a strategy for if the board decides to push you about.

There’s no need to let it go to waste. A low-profile riving knife, in addition to offering continuous protection, also has the benefit of never getting in the way, so you’ll never be tempted to remove it.

Only a Little Security Is Provided By Splitter Splits Only

Because a splitter is a fixed piece of equipment, it must be placed much farther back on the table saw’s throat plate to avoid interfering with the operation of the blade when it is raised to its maximum height. Backlash may be reduced by utilizing a splitter with an elevated blade. Despite this, lowering the blade widens the gap between the blade and the splitter’s teeth, allowing the wood to come into contact with those teeth.

When the blade is turned to make an angled cut, the splitter must also be removed. It might be difficult to reattach splitters, so they are easily neglected. 

On the other hand, riving knives have one distinct advantage over splitter-trainers: they can’t be converted to an existing table saw. It’s better to have some than no protection at all.

It’s better than doing nothing at all. The addition of splitters to any saw without a built-in riving knife will make it more effective. However, when the blade is set to cut through thin materials, there may be a reaction.

How To Cut A Rabbet Joint With A Table Saw?


Rabbets and dados are two of the most popular methods for connecting pieces of wood in cabinet construction. They may be trimmed using a dado blade on a table saw, as demonstrated in the instructions below.

Don’t be fooled by the word dado—a dado blade, or dado stack, not only cuts dados and rabbets but it’s also used to cut both. When you hear carpenters talking about “dado out,” they’re usually referring to the fact that a dado blade cuts a gap into whatever you’re working with, regardless of the joint type.

How to define a rabbet joint?

A rabbet is a cut made into the edge of a workpiece’s perimeter. The tongue is the portion that protrudes from the piece. The result of connecting a rabbet to a piece of wood is a rabbet joint, which is commonly used to make shelves and cabinets. These joints are ideal for creating drawers, cabinets, and smaller products such as picture frames. They may be sliced with a table saw table-mounted router, or handheld router utilizing a rabbet or straight bit.

Because a rabbet provides more of a mechanical connection, a rabbet joint is sturdier than a typical butt joint, which is simply two straight edges joined together. The groove is often a thinner space between the two boards, allowing more room for the glue to fill in. This allows for a stouter joint since the rabbet pinpoints additional surface area for the wood to be bonded, resulting in a stronger connection except for simply nailing or gluing two straight edges together. For a more robust rabbet joint, use a double rabbet joint, in which both the edges of adjoining pieces are rabbeted.

Comparison of rabbet joints and dado joints

In carpentry, rabbets and dado joints are both employed frequently, and they may be used to make a rabbet and dado joint. A dado is a channel that has been cut into a piece of work. The channel, often known as a dado cut, receives another piece of material that is measured and cut to fit snugly inside the channel to form a dado joint. To build a rabbet joint and dado joints, the dado cut is given the rabbet to form a more solid and static joint than a through-dado.

A dado joint is a strong carpentry connection that’s frequently used in a range of woodworking projects, particularly as cabinet and shelf support that must be able to support hefty items. A chamfer (vs a rabbet’s two-sided surface) enables for further contact area on the neighboring piece of wood, resulting in a more durable end product.

Choosing the right joint type will influence the finished appearance and strength of the connection, so imagine where the cabinet or shelf will go and whether it will have to support heavy-duty or light items.

In four simple steps, you may cut a rabbet.

A table saw along with a stacked dado blade is an easy and accurate method for cutting all kinds of joinery pieces. A dado stack is a combination of saw blades with a 1/8 inch kerf on the outside and chippers on the interior, similar to bread. You may change the width of the dado stack to match your cut and material thickness by adding or removing inner blades.

If you’re using a small table saw or just are not comfortable in making wider cuts in one pass, make several passes to obtain the desired width. If only you have a router table or a handheld routing tool, be sure to get the right bit for rabbet cuts.

  • The guide should be put in its proper position.

There are various ways in which we can cut a rabbet, including purchasing a specific rabbeting bit. A 1/4-inches x 1/4-inches snip is made here. 1/4-inches thick plywood is cut to the size that fits a cabinet back, then rabbeted in the rear to accept the 1/4-inches plywood back. Use a piece of similar wood to set up the guide’s position first, then tighten it in place.

  • Routing the rabbet

To cut a rabbet, begin by running the router from the left towards the right along with the guide. You can also use this method to cut rabbets with greater width. I’m going to walk you through each of these methods, but the key is that you’ll have to make one pass down the guide and then freehand clean up the rest of the wood. Simply put, we’re just moving the bearing a bit away from the straight edge so that the last of the wood can be removed. Keep the router’s base as close to the guide as possible at all times.

  • Dado stack set up

Always make sure the saw is turned off before working inside of it. To convert a regular saw blade to a dado stack, replace it with a dado stack. The width of the dado blade should be somewhat wider than the thickness of the plywood you’re working with. Cutting teeth should be turned toward you and offset from blade to blade. Make sure the blade is square and adjusts as needed.

  • Sacrificial fence setup

Lower the blade until it’s flat against the rip fence, then secure a sacrificial fence with a rip fence to ensure that the cut reaches all of the wood’s thickness. A single-pass will ensure a nice, clean-cut.

  • Run a test cut

Instead of a tape measure, use a metal ruler for additional accurate readings and set the dado blade to half-inch depth, or as needed, for the size of your workpiece. In general, the depth of the rabbet cut should not exceed a half-inch into the wood’s thickness or else the joint will be weakened and only a third is advised. Then, using scrap wood and clamps, cut your material to size. Make sure there is a ¼ inch ledge on each edge or whatever you want for your project.

  • Making rabbet cuts.

Remove the Dado’s from all four pieces, leaving just the tops and the bottoms of the side pieces. Cut the pieces so that the cuts appear on the inside of the cabinet. If you use Ken’s measurements, the depth will be half an inch to allow for a quarter-inch space for the tongue. After a few rabbets are cut, examine the joint for fit and make any necessary modifications to your fence.

What is A Dado Blade? A Complete Guide

Benchtop saws are popular in most of the woodworkers’ and craftsman’s workplaces. Dado blades, sometimes called stacked dados, are a type of table saw blade. We’ve created a comprehensive dado blade tutorial, including information on how to utilize them and where they may be utilized.

Introduction to Dado Blade?

A disc with teeth all around the edges is a typical circular blade used on a desktop or cabinet saw. Single-disc blades are used in single-disc saws. One thin disc is used to generate single-disc blades of various materials.

For a dado cut, you’re removing a significant quantity of material, so you’ll need a bigger blade. The stacked blades are built from two cutting blades on each side of a pair of chipper blades.

How Do Dado Blades Work?

On the outside of the dado blade, pay special attention to the blades. There are more teeth than in the main chipper blades, which will be helpful when you’re mulching.

The distinction between a snap-on table saw and a stationary one is that there should be an outer blade on the stack’s sides. This is the most ideal way to clean your lawnmower blades since it will not affect their operation. Turn one of them so that it faces the outside and the other one to the interior.

The flat blade on the left will have fewer teeth than the one on the right. You may change the number of blades in the center. The width of the cut would be altered. Once you’re ready, turn on the tool and begin cutting.

What kind of saw has a dado blade?

A table saw is a tool that works with a dado blade. However, the compatibility will be determined by the specifics of the saw and blade. That is why you should compare the size dimensions and make sure they match.

Is there a difference between all dado blades?

There are two different kinds of blades in the market:

  • Cutting dado blade set
  • Chipper dado blade

Aside from the sizes, you may also get them in different forms. The usual size is 6-7 inches, with diameters up to ten inches for bigger tools.

Cutting Dado Blades

The blades are like regular saw blades in that they’re also circular and contain many teeth all over the edge. A chisel is used to insert a cut along the groove’s edge, offering a straight line.

Chipper Dado Blades

Chipper blades are placed between two standard blades to efficiently process larger quantities of wood. A variety of various designs are available, with four carbide-tipped teeth and a kerf wider as compared to the outer cutting blades.

You may adjust the chipper blades to make a wider dado cut or narrower by moving them closer together or further apart. To create an even stack of boards, alternate the variety of cutting side blades. The stack is then mounted on your table saw’s arbor.

How is Dado Wobble Blade different from Stacked Dado?

Dado blades come in two distinct forms: stacked and wobble. A dado wobble blade, for example, is a variation of the stacked dado that wobbles when it cuts. The wobble dado, on the other hand, is made up of just one blade.

The single blade is twisted in such a manner that it slices into numerous places on the log as it rotates. Grooves produced by a hand tool have less of a clean cut along the groove’s perimeter or base.

What are the uses of Dado Blades?

Dado blades are mostly utilized in carpentry to create dado joints. They may also be used for rabbet cuts, groove and tongue work, and large-scale removal.

What Is Dado Joint And How Does It Work?

To comprehend a dado joint, we must first consider a dado cut. It is a plane-bottomed groove made in a slab of wood. This may be in either a crosscut or rip orientation, depending on your project’s requirements.

A miter and table saw fence may be used to help support the wood while you make a crosscut direction dado cut. For a rip dado cut, place the rip fence near the dado blade. Push the stick to guide it ahead. A dado is formed as a result of this process.

The groove is cut to the width similar to the mating workpiece when it’s used to create a dado joint. After that, the mating piece is inserted into the slot, which may be done with a tight friction fit or by hand. Bookcases and cabinet constructions are good homes for them.

Use off Dado Blade On Table Saw

To the arbor, a dado blade is secured in the same manner as a standard blade. The second significant difference is an insert change of the table saw that should fit the dado blade kerf.

Adjust the height of your arbor by moving your dado blade, depending upon the dado cut’s depth. Adjusting the height changes the dado depth, which affects how much material is removed. We wouldn’t advocate rotating the arbor and employing the blade at an angle since it wasn’t designed to be utilized in this manner.

The Dangers related to a Dado Blades

Dado blades are fantastic for cutting grooves, but they have a variety of hazards than a basic circular blade of the saw. 

The blades are heavier and thus harder to stop quickly. It is because the majority of table saws reverse the power to the motor when they break. However, because of the heavier weight and greater inertia, the blade takes longer to a stop. This is harmful since there’s a higher chance you’ll face an accident while it’s stopping.

The mechanism of a SawStop break can be used for instant stop. as far as the dado set is completely conductive. However, you must utilize a certain break cartridge designed for a dado set.

There are additional worries that you won’t be able to adequately guard them against the above. While moving the wood up and down on top of the saw, they become considerably more dangerous.

The backing is more difficult since a dado stack does not allow the use of a riving or a splitter knife. However, because there are various ways to make a cut in woodworking, you may instead utilize a different approach than the dado stack.

How To Sharpen a Chainsaw with Dremel?

Chainsaw blades don’t remain sharp forever. The kind of work you do and depending on how often you use your chainsaw, will determine the machine’s wear and tear. They, like any other machine, require regular maintenance and especially on the edges.

Sharpening the chainsaw and properly caring for it far is less expensive than constantly purchasing new. A sharp chain reduces the possibility of kickback and injury and also leads to more productivity and efficiency. 

If you’re wondering whether a Dremel chainsaw sharpener is appropriate for your equipment, read on to learn more about how to sharpen a chainsaw with a Dremel.

How can you tell if the chainsaw chain is not sharp?

A decent chainsaw will cut wood more effectively, safely, and swiftly. A dull chainsaw blade is more difficult to use and is more likely to kick back.

So, how can you tell if the chainsaw chain is dull?

It’s dull if your chainsaw produces dust instead of wood chips when it cuts. It’s dull if you need to physically push the chainsaw to make the cut.

The chainsaw should cut wood without requiring any physical force from you.

How do you know if it’s worth sharpening your chainsaw?

Yes, of course. Chains are not only expensive, but they can also be time-consuming and inconvenient. Especially if you have to replace them frequently. Taking down and reassembling a chainsaw is more difficult than simply using a Dermal to sharpen a chainsaw.

For safety reasons, you’ll also need a good chainsaw. A dull chain is more likely to rebound and cause harm.

So, follow these steps to properly sharpen a chainsaw with the Dremel. Before purchasing a new chain, you may generally sharpen it 10 times. If you have a $35 chainsaw chain, sharpening it can save $350! Who doesn’t want an extra $350?!!

Is it possible to sharpen a chain with a Dremel?

Dremel is a brand well-known for its sharpening and rotatory tools. A Dremel is also a tool that might be used for a variety of purposes. It comes with several attachments and add-ons. It’s also adjustable, so you can set it to your specific height and then attach the rotary head for quick and easy sharpening of your chainsaws. 

Therefore, yes, it is possible to sharpen the chainsaw with Dremel. Dremel tools provide an incredibly simple method to sharpen the chain of a chainsaw. The Dremel Sharpening Kit includes a guide to keeping the Dremel level and at a proper angle while sharpening.

Make Preparations


Before you start to sharpen a chainsaw with Dremel, you must first prepare your tools and workspace accordingly.

Gather the following items

You’ll need a tarp or a newspaper, oil for the knife, and a Dremel with a diamond grind attachment. A pair of gloves, a hard hat, safety goggles, and an overall are also required whenever you’re working with tools. Your safety gloves will shield your hands from harm and cuts. On the other hand, eye protection will guard your eyes against the iron filings. It is always preferable to avoid major damage than to treat it. As a result, staying attentive and using safe procedures are critical.

Look for a location with enough room

It is also critical to select a pleasant and open area before sharpening your saw. It will not put any strain on you to use it. The garage or a space in the backyard is the greatest location for this usage. You’ll be least disturbed if you carry out the operation in your garage. You may also handle waste disposal effectively. A garage has plenty of room to store the equipment, and it is well-organized.

Finally, there are also several garages that have a special area just for sharpening.

How to use Dremel for sharpening a Chainsaw 

Follow these steps to sharpen a chainsaw using Dremel.

  • Take a look at the Dremel Chainsaw Sharpening Kit to see which Dremel sharpening bit you’ll need for the chainsaw.
  • Attach the Guide and bit to the Dremel.
  • Use a black marker to mark the tooth on the chain where you need to begin.
  • To avoid injury, put on heavy-duty gloves before handling cutlery.
  • When you’re done sharpening all of the teeth on your Dremel, run a Dremel Sharpening stone over them all to keep the Dremel level and at a proper angle for each tooth. Sharpen that tooth with the Dremel.
  • To keep the teeth of the chain uniformly sharp, be sure to sharpen each tooth for the same length of time (for example, to a count of 10).
  • The teeth on the chainsaw are all in the same direction. On your sharpening guide, the ones between are sharpened in the opposite manner. So, pay attention to the tooth’s orientation while sharpening.
  • Sharpen every tooth on the chainsaw blade until you’re back at the black mark you drew on the first tooth.

Don’t Make These Mistakes When Sharpening a Chainsaw

There are a few things you should and shouldn’t do while sharpening your chainsaw.

  • The chainsaw blades have been over-sharpened.
  • Using a file that is the incorrect size
  • Using a dull file to sharpen the chainsaw
  • Rather than a depth gauge, use filing cutters.
  • Do NOT file backward


Other than these blunders, you should always utilize the appropriate chainsaw sharpening angles. This is extremely important, as it will ensure that the chain is stretched correctly. Failure to do so can result in the blades and/or chain being damaged.

Some tips

You have the option of sharpening your chainsaw manually with a file or using an electric chainsaw sharpener. Some individuals may even argue that sharpening it with their hands is acceptable, but this method is time-consuming and exhausting. Power chainsaw sharpeners are the most efficient, effective, and time-saving method of sharpening a chainsaw.

The efficacy of any device is determined by its ability to avoid wear and tear on its components. Using a chainsaw without oil will destroy it. The chain quickly wears down as a result of friction with the chainsaw bar. When you want to use your chainsaw, check the oil level.

How Tight should A Chainsaw Chain Be?

How tight should a chainsaw chain be? Is it possible for the chain to be broken if it’s too tight or not? I have a chainsaw at home and these issues have constantly occurred to me. So, I did some research on my own and tried everything I could think of. I made every effort with my chainsaw to get the job done—and here are the results:

What is the proper tension for a chainsaw chain?

A chainsaw that is properly tightened should be slightly loose from the guide bar. However, it shouldn’t be so free that it can fall out. It’s critical to maintain the chain and keep it aligned with the guide bar. If it comes away from the guide bar, give it a little tug and see if it engages properly. It’s also possible that it has been over-tightened. If the chain is too tight it will actually not be aligned properly with the guide bar and you will need to loosen it by a few degrees.

The proper tension is to keep the chain a little looser than the guide bar but not so loose that it can come off.

What Will Happen If the Chain Saw Chain Tension Is Incorrect?

Let’s look at what would happen if your chain wasn’t tensioned correctly. If the chain is a bit too tight, the guide bar will gradually curve as the chainsaw operates at high speeds. The chainsaw may break or become inoperative. If the chainsaw chain is a bit loose while being used, it may fall and inflict severe injuries to you or anyone nearby. 

Because of wood heaters and the fact that they are inexpensive, we can now observe a chainsaw in almost every household. They are now very relevant to an average home. However, when a chainsaw isn’t put to use for much work, we tend to neglect its maintenance. We don’t see this, but a chainsaw chain might loosen with each use.


It’s possible that it will need to be tightened after a few uses. As a result, before utilizing your chainsaw, double-check the alignment.

Adjust the chain tension on the chainsaw

We’ll start by describing what is the difference between good and bad chainsaw chain tension.

  • Good Chainsaw Tension

A well-tightened chainsaw chain must be a bit loosely aligned with the guide bar. Having said that, it must be tightened enough so that you are unable to separate the drive links from the bar nose.

Pull the chainsaw chain a little bit away from your guide bar to observe if the drive links stay connected or not. This will give you a clear indication to see if the chainsaw’s chain tension needs to be adjusted.

  • Bad Chainsaw Tension

When we pull away from the chain from the guide bar and the chain’s drive links come out of the guide bar as it is pulled, you need to make it tighter.

Tension testing of your chain

There are two approaches to check your chain tension.

  • The snap test

To do a “snap test,” pull your chain as far away from the bar as it will go. Then, release the chain. If it snaps snugly back in place, then that’s a great sign of adequate tension.

If you can’t remove the chain from the bar, your chain is too tight. If the chain just hangs limply when you pull it away from the bar, it’s too loose. 

This test is useful, but I prefer the second one.

  • The pull tests

The “pull test” is a measure of chain tension. Gently pull the chain away from the bar to do this test. 

With your palm facing down, push up as high as you can without losing contact with the chain. You want the chain to come away from the bar only enough that the drive links do not entirely clear it. The connection links should still pull out a little, but their ends should not exit the bar groove.

If your chain is too tight or too loose, you’ll need to adjust it.  Don’t worry, you may alter the tension of your chain with three simple steps.

How to Make a Chainsaw Run Smoother

To begin, you’ll need to complete three steps:

  1. Look for the tension screw
  2. Get your hands on the right tool
  3. Tighten the chain

Let’s see each step in more detail 

Look for the tension screw

The following are the top three places where you’ll find tension screws:

  1. The side panel is located between the bolts which hold the guide bar in place.
  2. If you’re facing the chainsaw, it’ll be slightly to the right of the guide bar and to the left of the guide bar bucking spikes (if there are any)
  3. A lot of new chainsaws have a built-in “easy-tension” system. Instead of tightening the chain with a screw, this kind of chainsaw has an integrated handle that you can twist with your hand to change tension.

Get your hands on the right tool

For most chainsaws, you’ll need a Scrench. But if your chainsaw has a built-in “easy-tension” system, such as the Oregon chainsaw, you don’t need a Scrench for this adjustment.

Tighten the chain

Turn the tension screw with your other hand while holding the nose of your guide bar in one. Using your pliers, twist and turn the tension screw until all of the drive links on your chain are covered by the guide bar. To summarize, tighten the chain links until they are level with the guide bar. 

Conclusion

Before you think about how tight should a chainsaw chain be? First, understand what the real issue is with your chainsaw. Does your chain need to be tighter; does it need to be sharpened? Maybe the chain needs to be replaced and tightening it more will only damage the chainsaw.  Chainsaws are powerful machines – yet they are very delicate and at the same time, dangerous to work with. Do consult with a professional if you don’t understand or don’t know what you are doing. 

What Are The Different Chainsaw Files That You Need?

Chainsaws are one of the most popular outdoor power equipment. The chain has teeth that cut through wood, which wear down over time and eventually become dull or damaged. When a chainsaw’s chain becomes worn out, you’ll notice it by feeling a hollow buzzing sound when the trigger is depressed – feel for any gaps in between each tooth. Using dull chain saws causes greater fuel usage and chain wear, so using sharp chains is critical at all times. You can sharpen the cutting teeth on a chainsaw using a file rather than replacing the chain when it gets dull and blunt, improving its performance.

Choosing the proper chainsaw file, while not every chain is made equal, is critical since it must match your chain. Choosing the incorrect file will reduce the performance of your chainsaw chain. Check your manufacturer’s manual to be sure what sort of chainsaw file you require for your chain.

Sizes of different files 

Simply said, the size of your chain pitch is determined by the type of chainsaw file you require. In some cases, it may be necessary to grind the file down little by little to achieve the right pitch. If you have too wide of an angle or are attempting to sharpen a tool that is covered in rust, you’ll need a larger file with higher cutting teeth. A larger angle implies more powerful files because of the cutting teeth. If you’re unsure about your chainsaw pitch, simply measure the gap between three rivets.

It’s also vital to note that you may require various files for various cutting teeth if they are not of the same type. Given the many varieties of chisel available for chainsaw chains, each will require a distinct kind of file.

Once you’ve decided on the pitch for your chainsaw chain, consult this table to determine the size of the file required:

Chain pitch Round file diameter
1/4″ 4.0mm
325 4.8mm
3/8″ 5.2mm.
404 5.5mm

Profiles of the files 

You should only use expert chainsaw sharpening files. Because chainsaw files have a unique profile (for example, a surface structure) in contrast to engineer’s files that would be completely unsuitable for sharpening chainsaws. If you’re not sure, check with a professional before getting started. If you use the incorrect file, you may have to replace the chain.

You’ll also need both round and flat files to get the best results when sharpening your chainsaw chain. The triangular file that comes with the kit is useless because it’s too small. You’ll need to sharpen the side and top plates of the cutting teeth after you’ve cut away all of your old nails. After that, use a flat-file to sharpen the depth gauge so it maintains its form.


How to Sharpen a Chainsaw with a File

Filing your chainsaw with a file is somewhat different than filing it on a filing machine. Like any other manual operation, it necessitates some planning and measuring in order to achieve the objectives successfully. These instructions refer to all chainsaws in general. However, it’s a good idea to consult your chainsaw manual for any instructions that the manufacturer suggests.

You’ll need a round file and a flat-file. The rounded hollow portion of the cutting link will be sharpened with the round file. To ensure that the cutting link is to the appropriate depth, it must be filed with a flat-file. You’ll also need a filing guide. When using the round file, you’ll want to use the appropriate filing angle. The filing guide will also assist you in determining the appropriate cutting depth to file the cutting link.


How often should a chainsaw chain be sharpened?

The question of how often the chain-cutting links should be sharpened is a bit more complicated. However, before your saw chain becomes dull and unsafe to use, we recommend that you sharpen it. Some people advocate sharpening your chainsaw after cutting a certain number of trees, while others recommend ten uses, and still, others suggest doing it after a specific amount of usage. When you sharpen your chain, we recommend that you do it after 40 hours of use or when you hit a rock, soil, or chop a hardwood tree. Those three can quickly dull your chain. Bluntsaws are particularly vulnerable to being blunted by rocks, which can quickly cause the saw to shatter. In general, you should keep an eye on your chain. Consider how it appeared when it was first constructed. It should never appear so altered from what it once was since the manufacturer intended for it to be cut.

When should I Change my Chainsaw Chain?

Chainsaw files can only work for so long before you need to change them. Even if you bought your chainsaw with a razor-sharp edge, it will wear over time. That will make it impossible to operate and dangerous. Knowing when your chain needs to be replaced can save you time, energy, and money. A strong chain doesn’t require much effort to cut wood since it is in excellent shape. It slices wood chips cleanly, so you don’t have to use as much fuel to make a deep cut into the tree or timber. As a result, you should be aware of the indications listed below in order to maintain your chain in good working order at all times.

Cues to when you should change the chain

  • You must apply pressure on the saw to make it cut through wood. When a good chain is placed on top of the wood, it pulls itself into the material.
  • When cutting vertically, you observe that the saw does not produce large chips. Instead, all that remains is fine sawdust.
  • Even when the chain is well lubricated and properly tensioned, you can see smoke.
  • Because the chainsaw jangles and bounces when cutting, you have trouble lining it up correctly.

In Conclusion

The most obvious indications that you should change your chainsaw are listed below. Of course, if you observe other symptoms such as a chipped cutting link or damaged links, you should replace the link or chain. When you’re done with your knife’s cutting edge, it should not be left alone until it has completely dulled. You should make sharpening a habit. Make sure to always keep a handy set of chainsaw files always at hand and learn to use them regularly. 

As soon as you detect a minor dullness or wear on the cutting edge, sharpen your chain. That will assist you in avoiding spending a lot of time and effort sharpening the chain, which is due to wear. You should inspect your chain at the end of each day or before storing it as a routine. You should inspect your chain at the end of each day or before storing it as a routine. 

Chainsaw Chain Direction: How to Get It Right?

Getting your chainsaw chain direction correct is a frequent cause of aggravation for those who have never had the pleasure of having it explained to them in a simple manner. 

A backward chain on a chainsaw does not cut properly. Furthermore, with regard to safety: if the chain is reversed, all of the cutting blades are directed at you! Although not rocket science, chain alignment is critical for using a chainsaw effectively (and safely).

Examine the Chain

Make sure to clean the chain before properly examining it. Check to see which direction the drive link is pointing. The drive links should be facing forward and should be pointed forward. The drive links are generally sharp and wavy spikes located on one side of the chain.

Place the end of the chain on the tip of your thumb and see if it points towards your desired destination. If it’s pointing towards the conclusion of the bar, then your chain is in fact pointing in the right direction. If not, you have to adjust it. There’s a different approach as well and you may attempt it. The cutter, which slices the wood, is one of the most essential components of the chain. So, be cautious since the cutter is sharp and may harm your limbs if you make contact with it.

The rule of thumb is that the blade should be facing or pointing forward, and to do this you can simply touch the cutter on the top. If you don’t feel comfortable doing it, check the metal’s form. The height of a metal cutter is greater than that of a plastic one since it is intended to cut through from the front side.

The front portion of the triangle should be pointed, and it should face the bar. The rear-end is not as open as the bigger front. You may benefit from careful study in this area. Another excellent approach is also available. There’s another little bit of metal positioned in front of the cutter, too. It’s not a chopping knife, and its primary aim isn’t to cut but rather to guide the cutter through the material.

That’s the reason it’s called a guide. The primary goal of this guide is to limit the wood sliced by the cutter. In modern machines, guides assist the overall performance of the chain in controlling the aggression of the cut. If the chain is pointing in the correct direction and is immediately in front of the cutter facing the bar, it’s fine.

However, if after examination you feel like the chainsaw chain direction is not correct, I’ll show you how to get your chainsaw chain running smoothly if you follow these four steps to have your chainsaw chain on the correct path. I’ll show you how to get your chainsaw chain running smoothly if you follow these four steps to have your chainsaw chain on the correct path.

If you just want to be sure about an already-installed chain, go to step 3, to learn a fast technique to check.

Make sure your chainsaw’s chain is heading in the correct direction.

  • Remove the chainsaw’s casing.

Start by preparing to replace your chainsaw chain. This involves removing the side casing from the chainsaw so you can access the bar and chain.

Excellent!  You’ll be able to access the bar and connect the chains.

  • Remove the chain and pry out the two pins.

Remove the chainsaw’s bar and chain. Set everything up in order. We’ll get to the good stuff later.

  • Determine whether the cut will go up or down.

There are three things you can examine on a chain to ensure it is pointed in the proper direction. 

In reality, probably just one out of three options below would suffice, but you could do all three if you want to be thorough.

The first thing you need to confirm is that the drive link is pointing forward.

It is a wave-shaped component that fits into the chainsaw bar groove. If the little wave is pointing towards the bar’s end (e.g., forward), your chain is oriented correctly.

You should also double-check that the blade is pointing forward and that it’s sharp. 

The cutter is the only component of a chain that cuts the wood, as the name implies. There are a few signs to determine which way the cutter is facing. You can feel it (maybe not the most prudent option, be cautious, or use a different technique). You can also tell which type of metal it is just by its form. The front of the cutter is usually taller and more open than the rear of the cutter.

Finally, you may double-check that the guide is in front of the cutter right now.

Some individuals mistake the manual for a strategy book. It’s not a cutting blade at all. Its purpose is to regulate the number of wood pieces sliced by the cutter at once (which controls the aggressiveness of the cut).

If any of this chain component terminology is unclear to you, or if you’re simply interested in learning more, be sure to read our comprehensive guide on the anatomy of a chainsaw chain.

  • Reassemble and ensure that the bolts are tight.

It’s now time to put everything back together after you’ve determined your chainsaw chain direction. 

Maybe it’s just a Dull Chain

So, you’ve gone through all of the above procedures, from removing the chain to inspecting the drive link or cutter, and you still can’t figure out why your chainsaw won’t start. The second concept that springs to your mind are that the chain is probably dull.

When you’re cutting down trees, you shouldn’t push or force them if you do so, since the chain will be dull and it’s time to replace it or sharpen it. It might appear to be a difficult chore, but many individuals believe that sharpening a chainsaw is difficult. There are now several easy-to-use chainsaw sharpeners on the market that can sharpen your chain in only 5-10 minutes. Some of the other concerns that you may encounter with a chain that is dull include chainsaw shakiness or bouncing while cutting, producing odd sounds, and so on. Dull chainsaws produce little wood chips rather than huge ones, and they don’t cut through dense knots well.

Many individuals try to add extra lubrication in order to clean and make it operate smoothly when this happens, but this does not address the issue. The entire machine instead begins to smoke.

Top 8 Best Pole Saws on a Budget

In this article, you’ll get a list of the best pole saws out there that do not cost an arm and a leg. Pole saws are a home necessity for anyone with a backyard full of trees and high-growing plants. Stead of getting a ladder and trying to reach high-up branches with a regular saw or chainsaw, make your life a whole lot easier with one of these ingenious devices.

The best thing is, despite common misconception, Pole saws don’t have to cost that much. You can avail of their benefits and do so without having to shell out too much cash. Listed below are the best pole saws on a budget that can be found in places like Amazon:

Best Pole Saws on a Budget

1. FLYHAWK Pole Saw

  • 6.5 Feet
  • Rated 3.8 out of 5 Stars
FLY HAWK Pole Saw, 78 inch Pole saws for Tree Trimming Tree Trimmer Foot Pole Pruning Saw blade Extension bar Manually use The Extension bar Saw Tree Trimming bar splicable Limb Saw and Trimmer
  • ✔ Polar saw blade: This saw blade has a sharp three-sided sharp edge and double-sided barb design. Wrapped in a soft handle, the grip is comfortable, easy replacement.
  • ✔High quality: The rod is made of detachable stainless steel rod, which can prevent rust and can withstand vigorous use.
  • ✔Length adjustable: Removable stainless steel rod, the length can be adjusted as needed, the head can be used alone.
  • ✔ Easy to assemble: it can be easily installed together in just a few steps. The adjustable-length rods are connected according to the height you need and connected to the handsaw for easy handling.
  • ✔ Widely used: very suitable for pruning and pruning leaves in forestry, gardens, lawns, yards and other places where pruning branches and leaves are needed.

At a price as low as a little over 13 dollars, you can have this easily adjustable Pola saw perfect for pruning, harvesting, and all-around gardening. The pole itself is made of stainless steel material and detachable in three parts — meaning its height can be adjusted to your needs accordingly. The two-way sawtooth saw can also be used as a regular saw on its own.

At 2.84 pounds, it is also lightweight and requires the most minimal effort to effectively cut through wood, branches, and stems.


2. Pole Pruning Saw

  • 6.5 Feet
  • Rated 4.2 out of 5 stars
Pole Pruning Saw Extension Pole-6.5 FT Pole pruner Use on Pole HandTelescopic,Tree Pruner Pole Extendable Limb Saw and Trimmer
  • [Durable materials]-Aluminum alloy telescopic rod, manganese hacksaw, lightweight and durable.
  • [Adjustable]- 6.6ft,telescopic range, the telescope pole saw is ideal for trimming and pruning branches and leaves.
  • [Sharp] The precision-ground, sharp teeth feature four cutting angles to ensure fast, clean, smooth cutting.
  • [Comfortable]- The foam grip increases friction to improve trimming efficiency, features shock absorption while increasing comfort.
  • [Wide Application]- Ideal for pruning, trimming leaves at forestry, lawn, garden and other place that needs to trim the branches and leaves.

With its aluminum allow rod, manganese hacksaw, and 4-angle precision-ground edge — this pole saw give you the most and more out of its 16.99 dollar price. The materials used make it lightweight enough to manage but durable enough to compete with thick branches and foliage. The foam grip allows for enough friction for the user to have a steady grip and the entire thing is adjustable in length. The tip can be used separately as a hacksaw on its own too.


3. MIYA Pole Saw

  • 6.5 feet
  • Rated 4.2 out of 5 Stars
Pole Saw - High Reach Pole Pruner with 6.5ft Lightweight Stainless Steel Pole - Manual Pole Cutter for Trees
  • 【Adjustable Length】This pole saw consists of several sections of poles. You could adjust the length from 3.9FT to 6.5FT according to your needs.
  • 【Premium Material】The pole pruner is made of a handheld blade and stainless steel pole, which does not rust and has a long life.
  • 【Effective Trimming】The blade of the tree branch saw has a sharp three-sided sharpened edge and a double-sided barb design could trim the tree effectively.
  • 【Muti-application】The manual pole cutter is very suitable for pruning and cutting leaves in forestry, lawns, gardens, yards and other places where branches and leaves need to be trimmed.
  • 【100% Customer Satisfaction】 All MIYA products provide three-year quality assurance and pursue 100% customer satisfaction. Please contact us if you have any questions.

As far as manual pole saws go, few can compete with a pole saw that’s classified as Amazon’s Choice — a title given to highly-rated and well-priced products that are ready to ship at a moment’s notice. The pole consists of several detachable sections and a handheld hacksaw tip. Made from a stainless steel material that can last a lifetime, spending 17.99 dollars to purchase this product is an investment in a lifelong tool.

The blade is three-sided and razor-sharp, making quick work of tree branches, stems, and other high-up plants. It is also tipped with a hook the is useful in snagging fruits and leaves.


4. INFLATION Extendable Manual Pole Saw

  • 6.5 feet
  • Rated 4.2 out of 5 Stars

Heat-treated carbon steel and non-stick coating mean this pole saw is perfect for tree pruning and forestry. The soft, anti-scratch handle provides a lot of support, and when compounded with the extra-long and sharp saw, can go a long way in cutting through branches like butter. At only 2.35 pounds, it is light enough that it won’t cause wrist fatigue.

This pole saw costs 18.99 dollars. There is also a longer 7.5-foot version of it that costs 20.99 dollars in case you need more length.


5. HOSKO 7.5FT Pole Saw for Tree Trimming

  • 7.5 feet
  • Rated 4.2 out of 5 Stars
HOSKO 7.5FT Pole Saw for Tree Trimming, Long Extension Pruning Saw, Blade Tree Trimmer Pole, Manual Pole Cutter for, Yard Garden and Patios Trees Branches Cutting
  • 【Two Perfect uses in One Saw】The saw up to 10 feet in length, can reach higher than a ladder, and it can be hand-held for lower trimming and carding
  • 【Adjustable Length】This pole saw consists of several detachable sections of stainless steel poles that prevents rust. You could adjust the length according to your needs and could be easy to disassemble and store
  • 【Razor Sharp Bi-directional Cut】The blade of the tree branch saw has a sharp three-sided sharpened edge and a double-sided barb design could trim the tree effectively.
  • 【Widely Application】The manual pole cutter can be used for tree cutting such as oak palm fronds pines firs and oak and is great for forestry, lawns, gardens, patios, yards and other area where needs pruning branches and leaves.
  • 【100% customer satisfaction】Please be assured of the purchase!With our 100% risk-free satisfaction guarantee you can rest assured you will be refunded if our products doesn’t suit your needs.

If you are looking for a pole saw that’s longer than usual to reach those extra high plants, then the HOSKO 7.5 ft Pole Saw is one of the most optimal choices. It boasts all the industry standards such as stainless steel detachable rods and razor-sharp hacksaw that can also be handheld. The sellers are so confident in their product that they offer refunds for unsatisfied customers. It costs just under 20 dollars to have and they also offer a 10ft long option for a little bit more.


6. SANDEGOO Pole Saw

  • 8 feet
  • Rated 4.4 out of 5 Stars

Serrated on both sides and longer than most ladders, there is very little that this pole saw cannot reach. The double-sided barb design can cut through wood and stem with ease and the upgraded sheaths make sure that the pole stays in one piece. Compared to other pole saws of the same length, this product is affordable without sacrificing quality.


7. GLORYA Pole Saw

  • 7.5 feet
  • Rated 4.2 out of 5 Stars
GLORYA Pole Saw - High Reach Pole Pruner with 7.5ft Lightweight Stainless Steel Pole - Manual Pole Cutter for Trees
  • 【Adjustable Length】This pole saw consists of several sections of poles. You could adjust the length from 3.9FT to 7.5FT according to your needs.
  • 【Premium Material】The pole pruner is made of the blade and stainless steel pole which does not rust and has a long life.
  • 【Effective Trimming】The blade of the tree branch saw has a sharp three-sided sharpened edge and a double-sided barb design could trim the tree effectively.
  • 【Muti-application】The manual pole cutter is very suitable for pruning and cutting leaves in forestry, lawns, gardens, yards and other places where branches and leaves need to be trimmed.
  • 【100% Customer Satisfaction】 All GLORYA products provide three-year quality assurance and pursue 100% customer satisfaction. Please contact us if you have any questions.

With a length that can easily adjust from 4 to 7.5 feet, the Glorya Pole Saw is a high-reach pruner that’s perfect for keeping the garden or orchard looking good. Boasting a 7.5ft Lightweight Stainless Steel Pole and a 4.2-star rating, many users say this is the perfect manual pole cutter for Trees. The product comes with blades tipped with hooks which means it stays on branches better and/or is ideal for harvesting fruits. You can have it for 20.99 dollars and Glorya Pole Saws also comes in lengths of 6.5 – 10 feet.


8. Amebee Pole Saw

  • 4-12 feet
Amebee Pole Saw Tree Cut and Hold Pruning Trimmer Garden Manual Pole Saws for Tree Trimming with Extension Extendable Tree Pruner Saw Long Reach Pole Saw Telescope Branch Fruit Picker (4-12 FT)
  • ⭐️⭐️⭐️⭐️⭐️ Premium Selection Value Buy 🥳 Purchase this Now 【DURABLE MATERIAL】- Aluminum alloy telescopic pole, Mn steel saw, lightweight and durable. Lightweight, durable and reliable, the telescopic pole saw is robust enough for pruning and trimming the branches and leaves. The pole is constructed of telescopic aluminum alloy tube.
  • 🍎 【TELESCOPIC POLE】- Features 4.2m overall length, 1.2-3.6 m (4-12 ft) telescopic range, the telescope pole saw is ideal for trimming and pruning branches and leaves. The precision-ground, sharp teeth feature four cutting angles to ensure fast, clean, smooth cutting.
  • 🍐 【Lightweight material and length adjustable】The foam grip increases friction to improve trimming efficiency, features shock absorption while increasing comfort. The foam grip increases friction to improve trimming efficiency, features shock absorption while increasing comfort
  • 🍋 【Wide Application】- Ideal for pruning, trimming leaves at forestry, lawn, garden and other place that needs to trim the branches and leaves. Efficient and comfortable, our telescopic pole saw provides users with the best sense of use. The taper-ground profile reduces drag and directs more usable energy to the cutting edge. Oval-shaped aluminum alloy extension poles provide precise blade control, vitally important for high cutting.
  • 🕺🏼 【Easy and Simple Installation】Unique design makes to cutand could be installed within 2 minutes and get ready to use, the disassemble and the store will also be really simple and convenient. The telescope pole pruning saw can be used for pruning, trimming leaves at forestry, lawn, garden and other place that needs to trim the branches and leaves.

The Amebee Pole Saw is made out of durable, lightweight aluminum alloy material which does not stain, scratch, or rust. It also does not require much to assemble as, depending on the kind you buy, possesses the longest pole length on this list — 12 feet from beginning to the end of the blade. Though it is also the priciest option on this list, it is still quite affordable in terms of average manual pole saw prices.

Conclusion

Pole saws, especially manual pole saws, are generally very straightforward items. Finding one that does the job should be at all like rocket science. The main consideration you should have when buying one is how long you want it and how much you’re willing to spend. Though you might think the “longer the better”, the longer the pole is, the harder it is to control — thus you’ll need a pole built to give you the most control possible. Hopefully, this list of the best pole saws on a budget was able to help you in that department.

How To Start A Fruit Garden

Growing your own fruit will not only save you money, but will help to save the environment as well. The more trees we plant, the healthier our local natural environmental will become. But, how do you start a fruit garden? Carry on reading when you want to know how to start a fruit garden anywhere.

How To Start A Fruit Garden Anywhere

It surprises many people, but you can start a fruit garden almost anywhere. Even if you just have a terrace or small garden, you can grow fruit trees.

Starting your own fruit garden, is all in the planning. There are a few things that you need to take into consideration before you go ahead and invest in fruit trees.

The Right Fruit Trees For Your Space

Apples is one of the easiest fruits to grow. The good thing about apple trees, is that they are a bit like people. They come in all shapes and sizes. You can grow apples in a pot on a terrace. In France, this is a popular way of cultivating smaller more delicately flavored apples.

Talk to your local garden centre or check online specialist growers. One thing is for certain, apple trees love terracotta pots. The best place to buy terracotta pots, is on Amazon. Your terracotta pot needs to be large to allow the apple tree to spread it roots out.

Needless to say, there are other tools that you will need. A good quality watering can, plant food, and a support. It is important to add the support at the same time you plant your apple tree.

Remember that the local climate plays a role. That is why you need to do your research before you buy your first apple tree.

Other small fruit trees for limited spaces include cherry and apricot trees. Surprisingly, apricot trees are very tolerant. When you live in a cooler part of the country, you can easily move them inside during cooler periods.

Can I Grow Fruit Trees Indoors?

Yes, you can. When you want to grow fruit trees indoors, you need to learn about pollination. If you can’t get friendly insects to pollinate your tree, you will have to learn how to do it yourself. Kim Eierman’s book The Pollinator Victory Garden gives you a fantastic insight into pollination.

Growing fruit trees indoors, is not something new. The Victorians were the masters of growing fruit trees in anything from living rooms to Orangeries. This is really a great way to start a fruit garden. The entire family can get involved and learn how fruit trees grow.

Fast growing indoor fruit trees include lemon, oranges, and mandarins. Kumquats are another fruit you should consider growing in your indoor fruit garden. They love to produce delicious fruits that taste great eaten on their own or turned into jams.

How To Start A Fruit Garden In A Small Urban Space

Can I grow fruit trees in a small urban garden? If you only have a couple of square foot to offer your fruit trees, there is no reason why you should not grow them.

However, this is where planning comes in. A year or so before you plant your fruit trees, it is a good idea to start growing pollinator plants. What are they? They simply are plants that attract pollinating insects such as bees and butterflies.

Don’t worry, you are not going to be wasting space. Most pollinator plants are useful plants that you can use in your kitchen. The best pollinator plants are herbs such as lavender, rosemary, and nasturtiums. The herb chives with its pretty pink flowers is often overlooked. It is a shame as its pretty pink flowers attracts friendly pollinators.

Flowering vegetables also help to attract pollinators to your plot. The best ones include, cucumber, bell peppers, tomatoes, and zucchini plants.

Planning ahead allows you to enjoy the best of everything. Before you know it, your plot will be producing vegetables, herbs, and fruit.

What Are The Benefits Of Having Your Own Fruit Garden?

Is starting your own fruit garden worth your while? Not only will a fruit garden give you fruit, but it is a fantastic hobby that will continue to grow. Once you have found out what fruits grow well in your garden or home, you can continue to expand your home grown range.

Feeding with organic feeds will help to keep your plants healthy and organic. The fruits that you grow will be healthier than fruits bought in the supermarket.

As you progress, your fruit garden will become more and more self-sustainable. It is important to remember that leaves produce compost. A good quality compost is something that you will need to keep the soil in your garden healthy. Invest in a composter right from the start and produce your own compost.

Gardening in a small place will also keep you fit. You be surprised how much aerobic activity gardeners do.

Environmental Benefits Of Fruit Gardening

There are also environmental benefits that you should take into consideration. All of those lovely herbs, fruit trees, and vegetables will convert harmful airborne compounds into oxygen. It is said that if we all planted a tree or a window box. the air quality in our cities would improve. So keep the right pruning tools for good tree health.

You will also be doing the soil in your small garden a favor. Critters such as worms and soil insects love a fruit garden. And yes, you may find some of them in your pot as well.

Finding out how to start a fruit garden is not complicated. It is a learning experience that has so much too offer all of us. Before you know it, you will be swapping fruits with other fruit gardeners and making your own fruit based produce. There is nothing like eating your own home-produced fruit. It tastes much better, and of course, you can grow the varieties of fruits that you and your family like.